construction advice

The Kitchen Work Triangle and Work Zones (Which Is Best For You?)

The Kitchen Work Triangle and Work Zones (Which Is Best For You?) 1695 802 Tessa Maristela

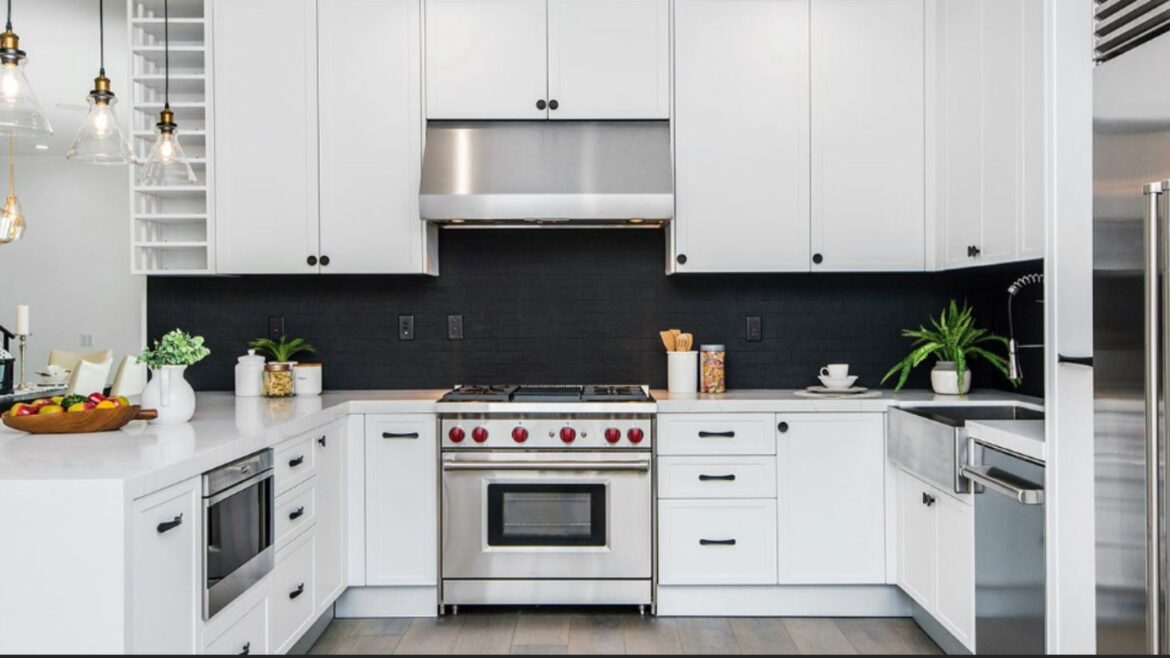
The kitchen work triangle is a design principle comprising three major work areas zoned into: the sink (cleaning), the range or cooktop (food preparation), and the refrigerator (food storage). These three work zones, when laid out to form into an imagined triangle, facilitates daily kitchen tasks effortlessly with an open work flow. It makes for an efficient layout that supports productivity,  movement and foot traffic.

The design principle dictates that all three sides of the triangles must measure between 4 feet to 9 feet apart with an ideal triangular perimeter of between 13 feet to 26 feet. This promotes a convenient and modest distance between each work zones that also saves time in moving from one work space to the other.

The kitchen triangle is a commendable layout but may not be ideal for all kitchen given the variety of needs of a contemporary family. A kitchen having beyond the modest size may allow for more than one cook at a time, which finds the work triangle limiting and less functional. There is a larger demand for more appliances in a sizeable kitchen which may be challenging to fit into the traditional work triangle concept.

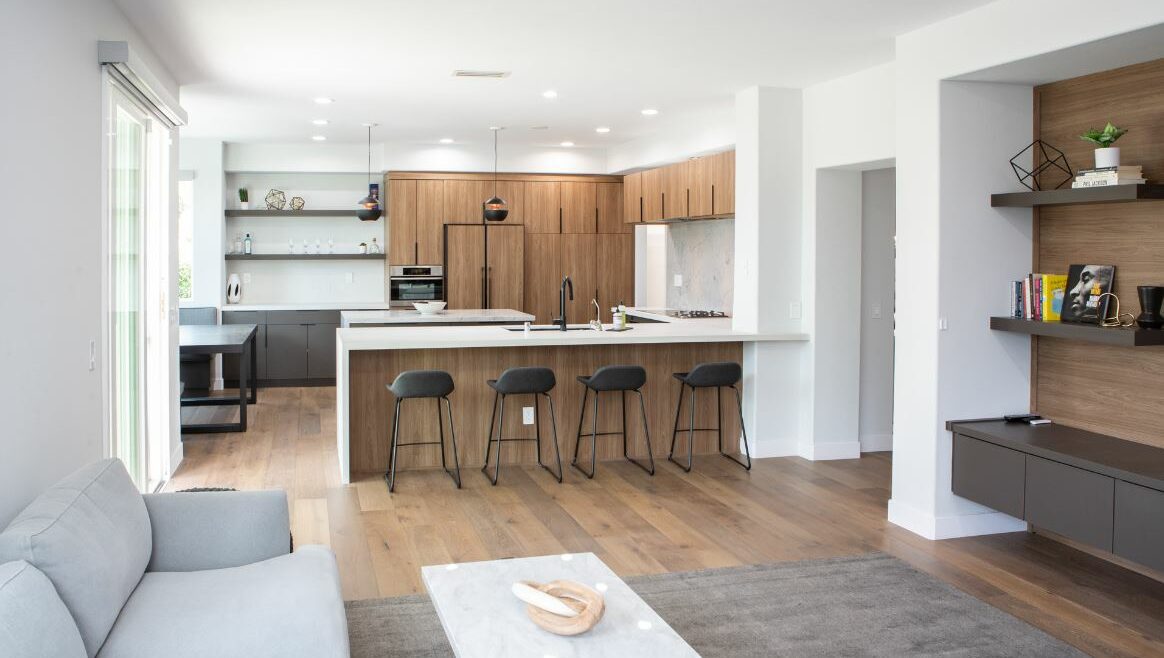
A kitchen design must be flexible to movement and work convenience. If there’s an engaged foot traffic in the kitchen that allows the kids and both the parents to be in the same space, the design can adopt different work zones that distributes the traffic and work flow evenly, instead of the three triangular points of the sink, range and fridge. The work zone is a pliable modern approach linked into the work triangle with clear emphasis of the zone function rather than the spread and perimeter of the triangular work spaces.

The modern kitchen has work zones prevalently factionalized into: (1) food preparation and assembly (range, cooktop, oven, microwave, etc.), (2) food storage and refrigeration (refrigerator and pantry), (3) cleaning and food disposal (sink, dishwasher, trash and waste incinerator), (4) cooking containers (pots, pans, skillets, etc.) and (5) plates and utensils (plates/bowls, spoons/forks, cutlery, blender, etc.). These zone areas have functional integration that connects the tasks of food preparation to cooking to dishwashing and food storage.

A kitchen design, regardless of size and shape, must have the groundwork that is consistent with the principles of efficiency, work flow and foot traffic. As much as the visual element of the kitchen matters, design performance must account for optimum functionality in the application of the kitchen triangle or work zoning.

Are you planning to upgrade and remodel your kitchen soon? Contact us for a free consultation. We are here for you!


Photo Credit to Medhart Ayad

Design Solutions for Small Spaces

Design Solutions for Small Spaces 1027 664 Tessa Maristela
Photo Credit to  © Medhat Ayad

Small homes come with unique demands when it comes to designing their spaces. You will be surprised to find that each space has a hidden potential. You just have to be clever and creative with your design solutions to make them work for you. Dig into your decorative style, furniture, and storage needs that are adaptable, versatile, and agree with the limited space available.

SCALE OF FURNITURE

Among the first things to consider are the size and amount of furniture. Do not torment your space with enormous furniture and overcrowd it like a stuffed turkey. Instead, scale down the size and amount of furniture so that it will fit into the space with ease. A minimal approach will prove to be more functional, as well as give you more space to move around.

MULTI-FUNCTIONAL FURNITURE

Contemporary furniture has come a long way with innovative designs that double up as storage. Using furniture with built-in storage is a clever solution to maximize your space. A few examples are beds with pull-out drawers underneath, sofas that transform into beds, coffee and side tables with removable tops to reveal an enclosed interior storage, and bench seating with pull-ups to access a storage space inside. Murphy beds are gaining back popularity, especially the custom-made design that multi-functions as a bed when pulled down from the wall and a table when the bed is pulled up and not in use. With the bed pulled up, the available open area can be utilized for other living functions.

CONCEALED BUILT-IN STORAGE

Do you know that there are concealed areas that are part of your house’s architectural features you can optimize? For instance, have you ever thought of adding roll-out drawers under each step of the stairs? Or a closet under the hollow space of your staircase? You can store shoes, bedding, cleaning towels, and whatnot inside the step drawers. Closets under the stairs can stand as a mini-library for your books or can be made into a utility space for cleaning equipment, or perhaps a place to hang umbrellas and raincoats.

MID-AIR SPACE

Petite houses with high ceilings offer the potential for a mid-air functional space, such as a loft, for use as a sleeping, entertainment, or office/study area. Lofts liberate floor spaces for other functionality.

SLIDING OR POCKET DOORS

Sliding or pocket doors dismiss your worries about hitting furniture in a cramped space, as hinged doors do when swinging them open. Changing your hinged doors to sliding or pocket doors is not a huge undertaking. The benefits to consider are far greater than the discomfort of moving or skirting around furniture, or knocking off a standing lamp next to a door each time you open it.

WINDOWS

Large windows open up your space, visually expanding it toward the outdoors. They also invite the view into the interior and allow natural light to come through. On the other hand, lack of window boxes in the room.

COLOR

There are design approaches that also apply to enlarging your space, like the intelligent use of color. Light colors visually broaden the size of the room compared to dark colors that make them look smaller. You do not have to choose one color for the whole room. Be inventive: you can apply the same color on the majority of the walls, except perhaps for one wall that you can make into your focal point.

LIGHTING

Have you ever entered a dimly lit room and felt so enclosed? You can fix that with the right kind of lighting. Lighting brightens up a room, be it natural or electrically powered, and like light colors, provides a feeling that the room is bigger than it normally is. If you do not have enough windows to embrace natural light, compensate for it with good lighting.

MIRRORS

Decorative mirrors’ reflective nature creates the illusion of space. Placing it strategically in small spaces like hallways, foyers, above console tables, and even in bathrooms can make tiny or narrow spaces feel bigger. Mirrors also bounce the light back into the room, making it look bright, cheerful and visibly widening the space.

Small spaces do not have to be viewed as a disadvantage. You just have to think outside the box to convert it favorably with creative solutions. Let us know if you need help with maximizing your space. We are ready to hear your story.

© Max Vakhtbovych Photo

What is an ADU?

What is an ADU? 1155 765 Tessa Maristela
Photo Credit to © Max Vakhtbovych

Demand for housing in California is at a steep incline in ratio to its production rate. The fraction of houses built is less than 50% of what has been necessary in the last ten years. The increasingly unfulfilled demand forcibly influences housing costs, which consequently collide with affordability, and becomes a challenge to renters and homeowners alike.

An ADU is an alternative housing that addresses these challenges and provides benefits that both renters and homeowners can enjoy. ADUs stretch the bracket of housing categories to increase the endorsement of affordable housing for renters, while providing supplemental income and value to a homeowner’s property with extra square footage.

WHAT IS AN ADU?

An ADU or accessory dwelling unit is an additional living space to a primary residence that provides self-sustaining amenities. Utilities are conventionally connected to the single-family structure within the property. An ADU has its own kitchen, living/dining room, bedroom, bathroom and an exclusive entrance.

ADUs have a few diversities:

  • Detached: The unit is not connected to the main house. It could be a new building or a detached garage conversion.
  • Attached: The unit is an attached first floor/second-story addition to the main house.
  • Converted Interior Space: Also known as a JADU (junior accessory dwelling unit), the space is an existing part of the primary residence converted into an independent living unit. An attached garage, attic apartment or master bedroom are ideal conversions.

WHY BUILD AN ADU

Homeowners build ADUs for flexible reasons, including provision of habitable space for visiting guests or independent living to senior relatives, in-laws and grown-up children. The more prevailing reason why homeowners build ADUs is to create a stable source of auxiliary revenue. Renting ADU spaces establishes additional financial gains for mortgage payments or covering other living expenditures.

BUILDING PERMIT

Is a building permit required for an ADU? Absolutely. Local governments require a permit to legitimately build any habitable space within your property.

MAXIMUM ADU SIZE LIMITS

In July 2022, the California Department of Housing and Community Development updated ordinances, allowing for an ADU to have a maximum unit size of 850 square feet, or 1,000 square feet for ADUs with more than one bedroom. Local bureaus without any existing ADU laws in place permit a maximum unit size of 1,200 square feet for “a new detached ADU, and up to 50% of the floor area of the existing primary dwelling for an attached ADU (at least 800 square feet).”

A statewide exemption ADU is an ADU consisting of up to 800 square feet with a four-foot rear and side setbacks, and a structure height of 16 feet.

A JADU or junior accessory dwelling unit conversion should not exceed 500 square feet.

PROPERTY VALUE UPGRADE

Beside the additional monthly income derived from renting a space, an ADU appreciates the property valuation with the expansion of extra square footage. Given that a property owner selects the right model, manages his budget wisely and hires the right building professionals, an ADU can justifiably turn out to be among the most profitable investments for a homeowner like you.

* Photo Credit to ©Max Vakhtbovych

The Space Debate: Open Concept Versus Traditional Floor Plan

The Space Debate: Open Concept Versus Traditional Floor Plan 1164 779 Tessa Maristela

One of the major decisions in purchasing a new home or custom-building a home is choosing between an open concept or a traditional floor plan. Understanding the distinction between the two floor plans helps to decide which one best suit your needs.

Open Floor Plan

The open floor plan has been interminably the prevailing inclination of modern architecture. Walls that conventionally divide two or three rooms are eliminated to devise one room with unrestricted space. The kitchen, dining and living rooms are collectively integrated into one sizeable room.

Traditional Floor Plan

The traditional or closed floor plan reflects the classical elements of architecture defined by walls separating each room for a designated purpose.

A Brief Architectural History

Prior to the mid-40s, the traditional floor plan included a hallway that channeled access to each room isolated by walls to distinctly serve their function. The kitchen, considered a utilitarian section for food preparation, was located at the rear end of the house. The dining room was a formal area for meal consumption and the living room was essentially for socialization. In the 1900s, forward thinking architects like Frank Lloyd Wright revolutionized the configuration of the kitchen, dining and living rooms into one great space, transforming it into the heart of social gathering and entertainment. Thriving families became more relaxed and less forbidding in their approach to space use, especially in the fabric of urban living.

Pros and Cons 

Accessibility and Traffic Fluidity

People can move freely through a large space on an open floor plan, making itself seamlessly accessible to central living spaces such as the kitchen, dining and living rooms.  The absence of walls allows efficient traffic circulation for domestic activities or entertainment of large guests. In contrast, a traditional floor plan hinders movement while navigating around dividing walls or opening doors to access another room. People with mobility concerns such as those with walking aids or confined in a wheelchair may find walls and doors challenging in their limited ability to move effortlessly.

Natural Light

An open concept home obliges the sun to bathe the space with natural light through huge windows. A room with lavish supply of sunlight feels more cheerful, warm and cozy. Not to mention the additional benefit of having large windows invite into the interior a view of the outdoor landscape and to enjoy the spectacular changing colors of the twilight sky. Shared natural light also provide the opportunity to save on electricity use.

Traditional floor plans, on the other hand, have walls that are constricting and do not provide even distribution of natural light. Windows are smaller in each room, limiting the amount of light flooding in.

Sound and Smell 

Open floor plans have the disadvantage of sound and smell traveling across space, while traditional homes have wall partitions to suppress the spread of bothersome noise or odor.

Heating and Cooling

The traditional floor plan offers more economical heating and cooling distribution. Each confined space can be designated as a separate HVAC section, granting the capacity to manage temperature in rooms that are in use.

Temperature control in an open floor plan can be prohibitive. A large space naturally requires more cooling and heating and is less energy efficient. Huge windows that are typical in open concept homes provides less cushion against the outdoor cold or heat.

Socialization and Entertainment

Unlike a traditional floor plan, open concept homes enable you to enjoy conversing and exchanging stories with your friends and family in the living room while you are preparing meals in the kitchen, because there are no walls separating you from them.

Privacy

Open floor plans are excellent for social occasions but are limiting when you are looking for a quiet retreat from a gathering. The traditional floor plan provides a public space for socializing and personal space to relax and cherish your private time.

Clutter Control

There is a greater need to control clutter in an open concept layout to keep things tidy. Toys scattered on the living room floor need to be stored or a messy kitchen has to be organized at once to avoid unsightly disorder. Traditional homes have the advantage of hiding clutter behind wall enclosures.

Aesthetics

It is recommended to conceive a unified and collective design theme for a large living space on an open floor plan. A closed floor plan, however, is more flexible with creating design statements that can be unique in each room.

Safety

With an open-concept home, parents who are working in the kitchen have full visibility of their children at play or an elderly family member watching television in the living room. This is a discernable challenge in a traditional home, since wall barriers enclose the occupant of the room.

Open concept and traditional floor plans have both positive and negative attributes. Debating about which one works best ultimately comes down to fundamental considerations such as your lifestyle, funding, space requirement and growing needs.


qualified general contractor

How to Tell if Your Contractor is a Qualified General Contractor

How to Tell if Your Contractor is a Qualified General Contractor 2560 1707 Majid Riahi

As a general contractor, we know the importance of finding a qualified team to work on your investment project. Not only is it about the quality of work, but the ease of mind that they will complete your project professionally and timely. In addition, the effort you put at the beginning of your search and selection will allow you to establish expectations of the work performed and translate to a smooth-going (or as close it can be) process once they begin.

Here are ten (10) ways to tell if your contractor is a qualified general contractor:

1. Ask for their complete list of documentation

    • Date of license issue and expiration
      • If your contractor is unlicensed, the risk for problems goes up
    • Bonding information
    • Details on their insurance
      • Worker’s compensation for their employees
      • Liability Insurance

2. Review their resume

    • Legal name, Business address, city, zip code, phone number
    • Entity type
    • How long they’ve been in business
    • Financial stability of their business and relationship to your bank
    • Credit standing with suppliers

3. Verify their business and contractor’s license through your state

4. Request professional references and ask:

    • Do they begin and end on schedule?
    • Was the number of people employed acceptable for the size and scope of the project?
    • Does the work successfully pass inspections?
    • How responsive is the contractor to problems?
    • Is the contractor readily available via phone, email, or text?

5. Review their portfolio of work

    • The quality of their photography tells a story of their value

6. Ask to visit one of their current projects to see if they:

    • Maintain a stable and reliable crew of workers
    • Execute their craft in a skillful and professional way
    • Provide adequate site supervision
    • Cooperate reasonably with other trade
    • Use materials efficiently and effectively
    • Keep the job site clean and safe

7. Check their workers’ compensation and commercial general liability insurance coverage

    • In California, if a contractor has employees, they are required to carry worker’s compensation insurance. If a worker is injured on your property and does not have worker’s compensation, you could be financially responsible.
    • Commercial general liability insurance is not required in the state of California; however, it covers damage to your property. If the contractor does not have general liability insurance, they should be transparent with you in the case of damages or losses.

8. Contact the Better Business Bureau

    • Have complaints been filed against them?

9. Ask for their standard contracts to review. Never sign a blank, legal contract. To list a few:

    • Total Contract Price and Terms of Payment
    • Change Order practices
    • Owner and Contractor Agreement
    • Conflict Resolution and Termination
    • Contractor’s Mark-Up on Labor and Materials

10. Verify their contractor bond

    • The state of California requires contractors to have a license bond of $15,000. It covers any project the contractor agrees to perform. Please note: it may not be enough to cover if your project is worth more than the value of the bond.
    • Learn more about bonds here.

We welcome you to confirm our qualifications. We will provide all of the necessary documents to ensure you’re working with an incredible team that puts care and attention into your investment project.

Starting your project soon and sourcing qualified contractors? Contact us today!

Top 10 Questions to Ask Your Contractor Before Starting a Project

Top 10 Questions to Ask Your Contractor Before Starting a Project 2240 1260 Majid Riahi

Photo by ThisIsEngineering from Pexels

Let’s set the scene. You’re gearing up for a big property development project, and the excitement levels are at a fever pitch; you’re touching base with your partner every hour, on the hour to make sure things are running smoothly; and you’ve got the contractors all clued up and ready to go at a moment’s notice. All sounds good. What could go wrong? Well, in the hustle and bustle of a new development project, it’s easy for people to take that last factor, the contractors, for granted. People say: “They’re professionals! Of course, we can count on them.” But is that the case? You’ll want to make sure the contractors you choose are indeed the best fit for your project, and you can do so by asking them these 10 simple questions.

Can I see your contractor license?

Not all states require contractors to have obtained a valid, non-expired license, but that doesn’t mean that it’s not important. You’re investing a lot into that project (whatever it may be), and it’d be a crying shame if you left the work in the hands of a team who hasn’t proven their competence by acquiring a license. Oh, and don’t worry about offending your contractor; if they are fully licensed, they’ll have no issues with showing you the relevant proof.

Are you bonded and insured contractor?

Before your contractor’s team sets foot on your property, this question is essential. Then, if the worst should occur and disaster befalls your project, you’ll be thankful your contractor is bonded and insured—and therefore able to cover for the losses incurred.

How long have you been in business?

This question shouldn’t require much explanation. But, regardless of the situation, are you more likely to trust someone with years of experience or a true-blue beginner?

What are your company’s safety practices and protocols?

Safety should be one of your contractor’s top priorities. If they don’t have an answer to this question, be concerned.

Who will be my point of contact?

Any good contractor will provide you with a dedicated contact, someone who’s 100% in the know and able to respond to your queries. Without this person, you’ll soon feel left in the dark with regards to your property. That’s not a nice feeling, so it’s crucial to establish who your main point of contact will be before your project begins.

What projects have you taken which are similar to mine?

If you can get your hands on some case studies of your contractor’s prior work, you can get a feel for their quality and experience.

What’s the expected time scale for completion of this project?

It might make you feel like a child in the back seat of the car asking, “are we nearly there yet?” but don’t be ashamed. There’s nothing wrong with trying to establish a time scale for your project with your contractor. On the contrary, we recommend that you do!

What’s your warranty policy?

Sometimes, the flaws in a contractor’s work won’t begin to show until a little while after you’ve parted ways. If your contractor’s work starts to fall apart or crumble, you want to make sure they will correct it. That’s why learning about your contractor’s warranty policy is so important!

Will a dedicated team be assigned to my project?

Contractors, especially larger-scale ones, tend to have multiple teams on the go at any given time. Therefore, you’ll want to ensure that the same team sticks with your project for the duration. That way, you can rest easy and safe in the knowledge that an unfamiliar and inexperienced team won’t wander onto the construction site halfway through your project.

Are there any extra charges with your service?

The only thing worse than an additional charge is an additional charge that’s also a surprise! So, clear away any confusion and make sure you get all the bills out in the open.

Don’t take things at face value. Ask questions, be curious and know what you’re getting! Trust us; you’ll be glad you did.