Uncategorized

Essential Insurance Coverage for Construction Contractors: Complete Protection Guide

Essential Insurance Coverage for Construction Contractors: Complete Protection Guide 2560 1707 Cecille Maristela

Introduction: Why Contractor Insurance Is Business-Critical

Building in today’s construction market means navigating significant liability exposure that can destroy even established companies overnight. While homeowners focus on insuring their properties, contractors face equally critical insurance needs that determine business survival and client trust.

For construction companies undertaking complex projects, comprehensive coverage isn’t optional—it’s fundamental to operational success. One uninsured claim can result in bankruptcy, legal troubles, and permanent business closure.

This guide reveals the five essential insurance coverages every contractor needs, common coverage gaps that create dangerous exposure, and how proper insurance becomes a competitive advantage in professional construction markets.

The High-Stakes Reality of Construction Work

Why Construction Amplifies Insurance Needs

Inherent Risk Factors:

  • Multiple workers operating dangerous equipment daily
  • Weather exposure extending project timelines and creating hazards
  • High-value materials and equipment vulnerable to theft
  • Third-party exposure from neighbors, visitors, and delivery personnel

Financial Risk Reality:

  • Single accidents creating multi-million-dollar claims
  • Extended liability periods continuing after project completion
  • Regulatory compliance requirements with severe penalties
  • Professional reputation damage from uninsured incidents

Essential Insurance Coverage #1: General Liability Insurance

contractor insurance

The Foundation of Contractor Protection

General liability insurance protects construction companies against third-party bodily injury and property damage claims arising from business operations. This coverage extends beyond job sites to include products liability and completed operations exposure.

Core Protection Areas:

  • Bodily injury: Medical expenses when third parties are injured during operations
  • Property damage: Accidental damage to adjacent properties or utilities
  • Products liability: Injuries caused by materials or equipment provided
  • Completed operations: Claims arising after project handover

Coverage Essentials for Contractors

Minimum Coverage Requirements:

  • Liability limits: $2-5 million per occurrence for substantial projects
  • Aggregate limits: Annual total claim protection
  • Additional insured coverage: Automatic protection for clients and property owners
  • Contractual liability: Coverage when assuming liability through contracts

Real-World Protection: During foundation work, a contractor accidentally damages a neighbor’s water line, flooding a basement and destroying $75,000 in belongings. General liability covers property damage, legal defense, and additional living expenses—preventing business-ending financial exposure.

Essential Insurance Coverage #2: Workers’ Compensation Insurance

contractor insurance

Mandatory Workforce Protection

Workers’ compensation provides medical benefits and wage replacement for employees injured on the job while protecting employers from injury-related lawsuits. This coverage is legally required in most states and essential for business operations.

Comprehensive Benefits:

  • Medical coverage: Full injury-related medical treatment
  • Wage replacement: Typically, 66% of average wages during recovery
  • Disability benefits: Compensation for permanent impairment
  • Death benefits: Financial support for families of workers killed on-site

Managing Premium Costs

Cost Control Strategies:

  • Safety programs: Regular training and hazard identification reduce claims
  • Experience modification: Better loss history leads to lower premiums
  • Proper classification: Ensuring accurate job codes for fair pricing
  • Return-to-work programs: Earlier employee return reduces claim costs

Beyond Compliance: Strong workers’ compensation coverage demonstrates commitment to employee welfare, helping attract skilled workers in competitive labor markets while protecting against devastating workplace injury claims.

Essential Insurance Coverage #3: Builder’s Risk Insurance

contractor insurance

Protecting Work in Progress

Builder’s risk insurance covers the structure under construction, materials, and equipment from damage during the construction period. This coverage bridges the gap between project start and completed property insurance.

What’s Protected:

  • Structure development: Work completed to date
  • Materials on-site: Building supplies and fixtures
  • Equipment and tools: Contractor-owned construction equipment
  • Temporary structures: Site offices and storage buildings

Critical Coverage Considerations

Adequate Limits: Coverage should reflect the completed project value, typically the full construction contract amount. Underinsuring creates gaps when partial losses occur, leaving contractors responsible for uncovered damages.

Enhanced Perils:

  • Theft coverage: Protection for expensive materials and equipment
  • Weather damage: Wind, hail, and storm-related losses
  • Fire protection: Including electrical and mechanical breakdown
  • Vandalism coverage: Malicious damage to construction sites

Policy Ownership: Either contractors or property owners can purchase builder’s risk insurance. Contractors often secure coverage to protect their investment and ensure project continuity after covered losses.

Essential Insurance Coverage #4: Professional Liability Insurance

Protection for Design and Management Services

Professional liability (E&O) contract insurance protects contractors providing design services, project management, or professional advice that could lead to client financial losses.

Coverage Applications:

  • Design-build services: Protection against design errors and omissions
  • Project management: Coverage for schedule and budget management failures
  • Professional advice: Protection when providing construction consultation
  • Quality control: Coverage for failure to meet professional standards

When Professional Liability Applies

Design-Build Exposure: Contractors offering integrated design-build services face dual exposure from construction defects and design errors. A structural miscalculation requiring reconstruction creates significant liability exposure beyond general liability coverage.

Project Management Claims: Common professional liability claims include:

  • Schedule delays: Cost overruns due to timeline management failures
  • Budget overruns: Inadequate cost estimation or control
  • Quality failures: Missing defects that require expensive corrections
  • Code compliance: Errors resulting in regulatory violations

Essential Insurance Coverage #5: Commercial Auto Insurance

Covering Mobile Operations

Construction companies rely on vehicles for crew transportation, material delivery, and equipment hauling. Commercial auto insurance provides essential protection for business transportation activities.

Coverage Components:

  • Liability protection: Third-party injury and property damage
  • Physical damage: Collision and comprehensive for owned vehicles
  • Cargo coverage: Protection for tools and materials in transit
  • Hired/non-owned auto: Coverage for rentals and employee vehicles

Fleet Considerations

Enhanced Coverage Needs:

  • Higher liability limits: $1-2 million minimum for commercial operations
  • Equipment coverage: Protection for tools and equipment in vehicles
  • Driver requirements: Motor vehicle record monitoring and training
  • Multiple locations: Coverage for operations across different job sites

Risk Management Beyond Contractor Insurance

Construction Essentials

Safety Program Implementation

Comprehensive Safety Protocols:

  • Regular training: Monthly safety meetings and annual certifications
  • Hazard analysis: Site-specific risk assessment and mitigation
  • Equipment maintenance: Proper tool and machinery upkeep
  • Incident reporting: Immediate documentation and investigation

Contract Protection

Insurance Contract Provisions:

  • Additional insured requirements: Client protection under contractor policies
  • Certificate tracking: Ongoing verification of coverage compliance
  • Indemnification clauses: Clear risk allocation between parties
  • Waiver of subrogation: Prevention of insurer claims against project parties

Subcontractor Management

Comprehensive Requirements:

  • Minimum coverage limits: Adequate insurance for subcontractor scope
  • Certificate verification: Ongoing monitoring of coverage status
  • Workers’ compensation confirmation: Preventing coverage gaps
  • Additional insured compliance: Ensuring proper endorsements

Conclusion: Contractor Insurance as Strategic Business Investment

Comprehensive contractor insurance coverage represents essential business infrastructure that enables contractors to pursue profitable projects while protecting against catastrophic losses. The five core coverages—general liability, workers’ compensation, builder’s risk, professional liability, and commercial auto—create a foundation for business stability and growth.

Contractors who view insurance as strategic investment rather than necessary expense position themselves for long-term success. Proper coverage demonstrates professionalism, enables contract qualification for larger projects, and provides the financial security necessary for business expansion.

The construction companies that thrive understand that robust contractor insurance isn’t just protection—it’s a competitive advantage that enables confident bidding on complex projects while maintaining the financial stability essential for sustained business growth.

Ready to Evaluate Your Construction Insurance?

Immediate Action Steps:

  1. Review coverage limits: Ensure adequate protection for current project values
  2. Identify coverage gaps: Compare current policies against essential coverage list
  3. Document safety programs: Prepare evidence for insurance underwriters
  4. Contact specialized broker: Get professional guidance on construction insurance needs
Hollywood Hills Luxury Home Grand Entry

Interior Lighting Layout: The Complete Guide to Room Lighting Design

Interior Lighting Layout: The Complete Guide to Room Lighting Design 1079 720 Cecille Maristela

Introduction: Why Most Living Rooms Have Terrible Lighting

Walk into most homes and you’ll immediately notice the same lighting mistake: harsh recessed lights shining directly down on people’s heads, creating unflattering shadows and an uncomfortable atmosphere that feels more like an interrogation room than a cozy living space.

The problem isn’t the quality of the fixtures—it’s the placement. Professional interior designers know that proper lighting layout can make a $50,000 furniture setup look mediocre, while expert light placement can make budget furniture look expensive and inviting.

This guide reveals the fundamental principles of interior lighting layout, showing you exactly where to place lights for maximum comfort, functionality, and visual appeal in every room of your home.

The Psychology of Light: Why Placement Matters More Than Fixtures

Understanding Light Dispersion Methods

Before diving into room-specific applications, it’s crucial to understand how different lighting methods affect both atmosphere and visibility. The way light disperses through a space determines whether a room feels comfortable or harsh, spacious or cramped.

The Four Fundamental Lighting Methods:

1. Direct Lighting Light points directly downward with solid shades preventing upward or sideways illumination. Creates focused, intense pools of light—excellent for task areas like dining tables or reading nooks, but creates high contrast with surrounding areas remaining relatively dark.

2. Indirect Lighting Light bounces off the ceiling, using it as a giant reflector to scatter illumination evenly throughout the space. Produces soft, uniform, low-glare lighting that makes rooms feel bright and open—ideal for ambient lighting in living areas.

3. Direct-Indirect Lighting Combines both methods through translucent or open fixture designs. Some light illuminates surfaces below while some bounces off the ceiling. Provides excellent task lighting with ambient glow—perfect for offices and dining areas.

4. Diffuse Lighting Light passes through translucent materials like globe fixtures or fabric shades, scattering illumination in all directions. Creates gentle, shadow-free lighting throughout the entire room—the most comfortable for relaxation spaces.

The Critical Difference: Direct vs. Perimeter Lighting

The diagrams below illustrate the most common lighting mistake and its solution:

Incorrect Lighting (Left Diagram) The left diagram show a common mistake in lighting design.

  • Side View: Recessed downlights are placed directly above the seating area (sofas). The yellow light cones show the beams shining down on people’s heads. This type of lighting is often too harsh and creates unflattering shadows on faces, making it difficult to relax and talk comfortably.
  • Floor Plan: The top-down view confirms this, showing the placement of the lights directly above the furniture and the people sitting on it. The light is shining straight down, rather than illuminating the space from a more diffused source.

Correct Lighting (Right Diagram) The right diagram illustrate a better approach to lighting a living room.

  • Side View: The recessed downlights are placed to the side of the seating area, specifically between the furniture and the walls. The light is directed onto the walls and floor, creating a softer, more ambient glow that illuminates the entire room without shining directly on people. This provides a more comfortable and inviting atmosphere.
  • Floor Plan: The bottom-down view clearly shows the correct placement of the lights around the perimeter of the room and in front of the central furniture, rather than directly over it.

The diagrams effectively demonstrate the difference between harsh, direct lighting and soft, ambient lighting. The key takeaway is to use lighting to create a comfortable and welcoming environment, not just to illuminate a space.

Applying These Principles Across Different Rooms

The same perimeter lighting principles that work in living rooms are equally effective in bedrooms and other spaces. The key is always avoiding direct overhead lighting on people while creating ambient illumination that serves the room’s function.

Bedroom Lighting Done Right vs. Wrong

Good lighting can transform a room! On the left, you see how to do it right: soft cove lighting for a gentle glow, downlights to highlight features, and a soft shade on a hanging lamp to avoid glare. Bed toe lights are a great touch for safety and a subtle, modern feel.

On the right, we see what to avoid: a bright, “no purpose” downlight, disruptive glare from a bare bulb, and a night lamp that might disturb your sleep.


Common Lighting Layout Mistakes That Ruin Room Ambiance

interior lighting layout

Mistake #1: The Overhead Light Trap

What It Looks Like: Recessed lights or chandeliers placed directly above seating areas, dining tables, or conversation spaces.

Why It Fails: Direct overhead lighting creates harsh shadows under eyes, noses, and chins, making faces look tired and unflattering. It also eliminates the soft shadows that create visual depth and warmth in a space.

The Fix: Move overhead lights to illuminate walls and floors rather than people. Place recessed lights around the room’s perimeter, not in the center.

Mistake #2: Single-Source Lighting Syndrome

What It Looks Like: One ceiling fixture attempting to light an entire room, or relying solely on table lamps.

Why It Fails: Single light sources create stark contrasts between bright and dark areas, making spaces feel flat and uninviting. Eyes constantly adjust between light and shadow, causing fatigue.

The Fix: Use multiple light sources at different heights and angles to create even illumination throughout the room.

Mistake #3: The Wrong Light Temperature

What It Looks Like: Cool white (4000K+) LED lights in living areas, or warm yellow lights in kitchens and bathrooms.

Why It Fails: Light temperature affects mood and functionality. Cool light energizes but feels harsh in relaxation spaces. Warm light comforts but can make task areas feel sluggish.

The Fix: Use warm light (2700K-3000K) in living areas, bedrooms, and dining rooms. Use cooler light (3500K-4000K) in kitchens, bathrooms, and home offices.


The Correct Interior Lighting Layout Formula

interior lighting layout

Living Room Lighting: The Foundation of Great Design

Perimeter Placement Principle: Position recessed lights around the room’s edges, approximately 3-4 feet from walls. This creates wall washing that reflects light softly throughout the space while avoiding direct illumination of seating areas.

Layer Integration Strategy:

  • Ambient base: Perimeter recessed lights on dimmers
  • Task additions: Table lamps beside reading chairs
  • Accent highlights: Picture lights, uplighting, or decorative fixtures

Spacing Formula: For 8-foot ceilings, space recessed lights 4 feet apart. For 9-foot ceilings, use 4.5-foot spacing. For 10-foot+ ceilings, space lights 5-6 feet apart.

Substrata La Habra Kitchen

Kitchen Lighting: Function Meets Style

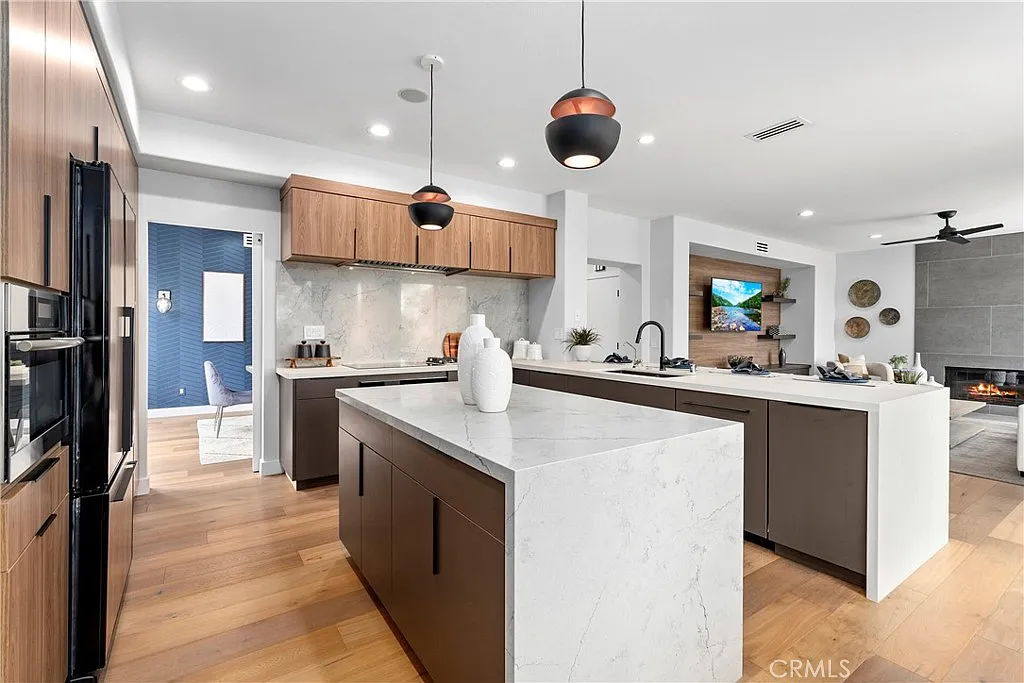
Under-Cabinet Task Lighting: Install LED strip lights under all upper cabinets to eliminate shadows on countertops. This prevents the common problem of working in your own shadow while preparing food.

Island and Peninsula Lighting: Pendant lights should hang 30-36 inches above countertops, with fixtures spaced according to island length:

  • 4-foot island: 2 pendants, 18 inches from ends
  • 6-foot island: 2 pendants, 24 inches from ends
  • 8-foot+ island: 3 pendants, evenly spaced

Ceiling Layout Strategy: Place recessed lights to illuminate walkways and work areas, not the center of the room. Focus on counter edges, sink areas, and appliance zones.

Bedroom Lighting: Creating Sanctuary Spaces

Overhead Elimination Approach: Avoid center ceiling fixtures entirely. Instead, use wall-mounted sconces, table lamps, and indirect lighting to create a peaceful environment conducive to rest.

Bedside Lighting Standards:

  • Sconces: Mount 60-66 inches from floor, 6-8 inches above mattress level
  • Table lamps: Lampshade bottom should align with eye level when sitting in bed
  • Reading lights: Position to eliminate shadows on reading material

Closet and Dressing Areas: Use vertical fluorescent or LED strips on both sides of mirrors to eliminate facial shadows. Avoid single overhead lights that create unflattering downward shadows.

interior lighting layout

Bathroom Lighting: Functional and Flattering

Vanity Lighting Best Practices:

  • Side-mounted sconces at eye level (60-65 inches from floor)
  • Fixtures should extend beyond mirror edges for even face illumination
  • Avoid single overhead lights that create harsh shadows

Shower and Tub Lighting: Use recessed lights rated for wet locations, positioned to light the shower floor and tub area without creating glare when looking up.


Conclusion: Transforming Spaces Through Strategic Light Placement

The difference between amateur and professional lighting design isn’t about expensive fixtures—it’s about understanding how light affects human comfort and perception. By moving lights away from direct overhead positions and creating layers of illumination at different heights and angles, you can transform any room from harsh and unwelcoming to warm and inviting.

Remember the fundamental principle: light the room, not the people. Place fixtures to illuminate walls, floors, and surfaces that will reflect soft, even light throughout the space. Combine this with proper light temperature selection and dimming controls to create spaces that adapt to different activities and times of day.

Whether you’re planning new construction, renovating existing spaces, or simply rearranging current fixtures, these interior lighting layout principles will help you create rooms that not only look better but feel more comfortable and functional for daily living.

Ready to Improve Your Home’s Lighting?

Start with these immediate improvements:

  1. Assess current lighting: Walk through your home and identify harsh overhead fixtures shining directly on seating areas
  2. Add table lamps: Place lamps beside reading chairs and in dark corners
  3. Install dimmers: Add dimmer switches to harsh overhead lights for better mood control
  4. Check bulb temperatures: Replace cool white bulbs with warm white (2700K-3000K) in living areas

Book a consultation to discuss how we can bring these interior lighting design concepts to your project.

Substrata Argyle Living

Modern Design Elements in Action: Behind the Scenes of Luxury Interiors

Modern Design Elements in Action: Behind the Scenes of Luxury Interiors 1920 1280 Cecille Maristela

Introduction: When Blank Walls Become Architectural Statements

How do you transform a bare wall into the focal point that stops guests’ mid-conversation? At Substrata, we recently faced this exact challenge in a $4.995M Hollywood Hills estate at 2161 Argyle Ave. The client’s vision was ambitious: create a monolithic marble fireplace that would anchor the living room without overwhelming the space’s clean lines.

The solution? A 6-foot Nero Marquina slab that makes “a silent statement,” proving that the most powerful design elements often speak in whispers rather than shouts. This project exemplifies how thoughtful modern design elevates everyday spaces into extraordinary experiences.

Today, we’re pulling back the curtain on five standout modern luxury design elements from our luxury projects in Hollywood Hills, Palisades, and Malibu—revealing the vision, execution, and transformative impact that defines exceptional custom interiors.


Design Element #1: Smart Material Selection That Ages Beautifully

Hollywood Hills Luxury Home Grand Entry

The Vision

Luxury shouldn’t require high maintenance. Our Hollywood Hills clients wanted materials that would develop character over time rather than showing wear.

The Execution

“We selected materials that age beautifully – like the patina-developing brass fixtures,” explains our design team. Every material choice considers both immediate impact and long-term evolution.

Strategic Material Choices:

  • European white oak herringbone floors: Develop richer honey tones with UV exposure
  • Unlacquered brass fixtures: Natural patina creates unique character over years
  • Natural stone: Calcutta marble gains depth as minerals settle
  • Weathering steel accents: Controlled rust creates protective coating

Maintenance Philosophy: Rather than fighting natural aging, we embrace it. Brass fixtures are specified unlacquered so they develop individual patina patterns. Wood floors are finished with penetrating oils that allow natural color evolution.

The Impact

Five years later, these materials look better than installation day. The home has developed personality through use—exactly as intended. Maintenance costs are 60% lower than comparable homes using high-maintenance finishes.


Design Element #2: Monolithic Marble Fireplace – The Silent Statement Maker

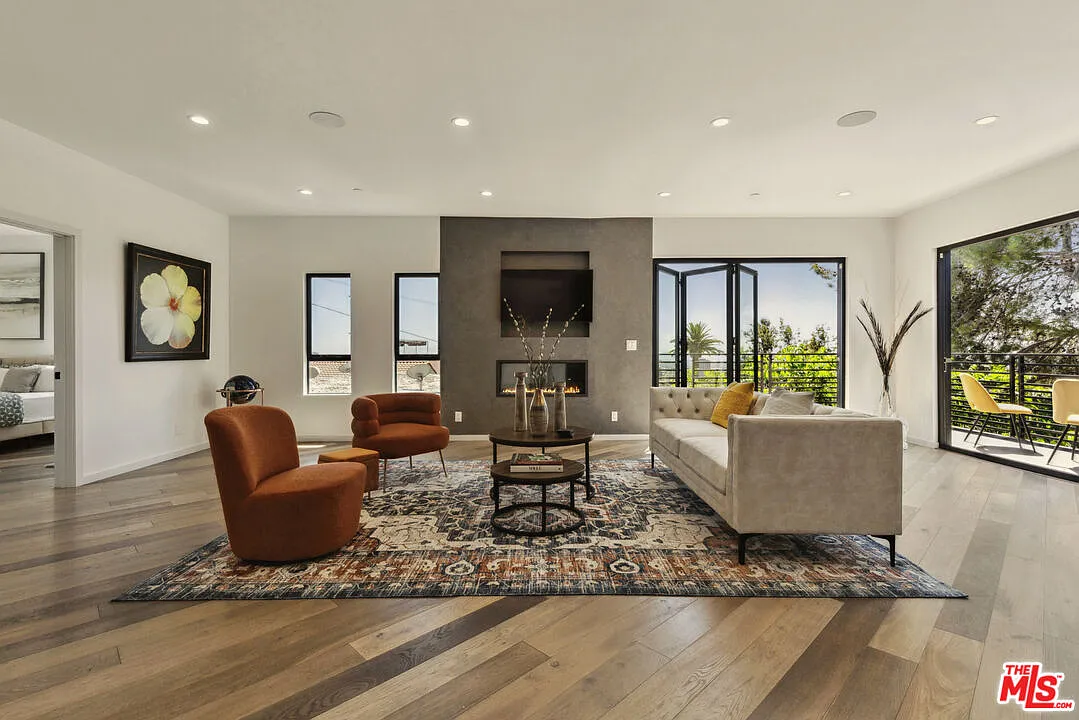
Hollywood Hills Luxury Home Entertainers Living Space

The Vision

The Argyle project’s 3,756 square foot living area needed an anchor point that could command attention without overwhelming the open-concept flow. Our challenge: create a focal wall that would complement panoramic city-to-ocean views rather than compete with them.

The Execution

We installed a “monolithic marble fireplace (6′ Nero Marquina slab) that makes a silent statement,” transforming what could have been an ordinary wall into the room’s gravitational center.

Materials and Craftsmanship:

  • Single Nero Marquina slab: 6 feet wide, 8 feet tall, 2 inches thick
  • Hidden mounting system: Steel framework anchored to structural wall
  • Book-matched veining: Carefully selected for dramatic white lightning patterns
  • Invisible gas insert: Clean-burning system with remote operation

Engineering Challenge: The 800-pound marble slab required custom structural support hidden within the wall cavity. We collaborated with structural engineers to distribute the load across multiple wall studs while maintaining the slab’s floating appearance. The mounting system took 3 months to design and 2 weeks to install with millimeter precision.


Design Element #3: Secret Wine Cellar Behind Custom Millwork

modern luxury design

The Vision

Wine storage needed to be both climate-controlled and mysterious. The goal: create a 300-bottle collection display that would surprise and delight guests while maintaining optimal storage conditions.

The Execution

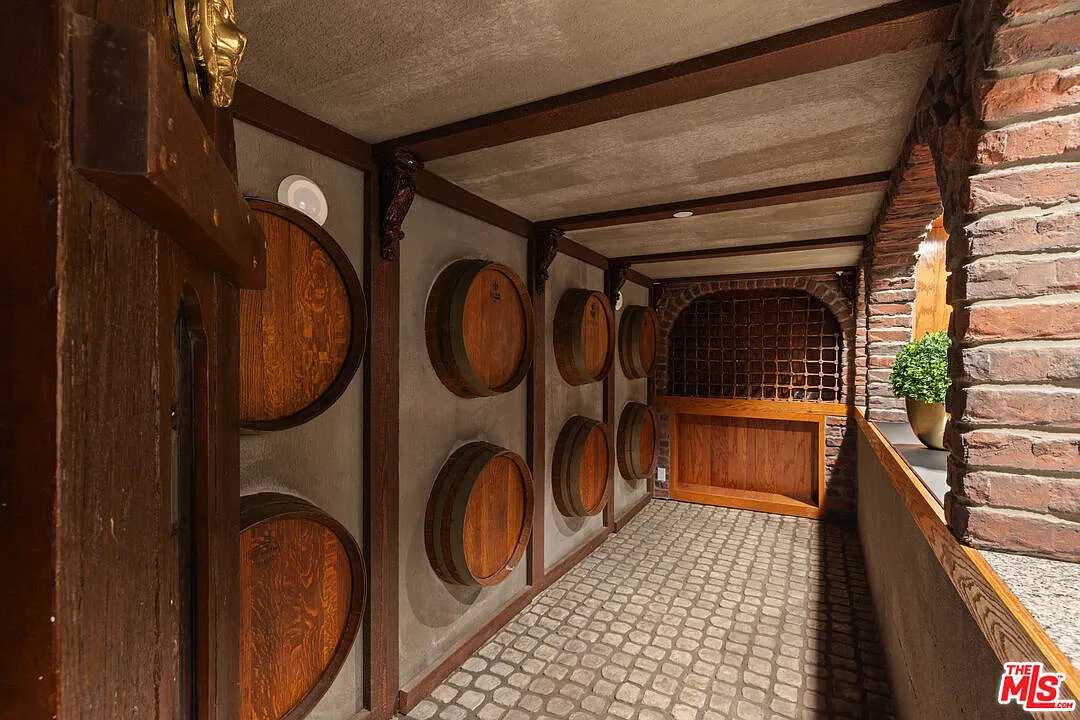
We created a “temperature-controlled wine cellar concealed behind custom millwork, its glass door revealing a curated 300-bottle collection” that functions as both storage and entertainment feature.

Hidden Integration Details:

  • Concealment System: Magnetic touch-latch opens seamlessly
  • Climate Control: Dual-zone cooling maintaining precise temperature and humidity
  • Display Lighting: UV-protected LED strips highlight bottles without damage
  • Custom Millwork: Perfect grain matching with adjacent cabinetry

Precision Craftsmanship: The hidden door weighs 180 pounds but opens with gentle pressure thanks to European hinge systems and counterbalance mechanisms. Creating invisible seams required master carpenters who hand-selected wood grain patterns and spent 80+ hours on finishing details.

The Impact

The secret cellar has become the home’s signature surprise element. Guests’ reactions are consistently memorable, with the reveal becoming a favorite part of home tours. The feature adds significant entertainment value while providing serious wine storage functionality.


Designer Takeaways: Lessons from Modern Luxury Design Projects

Panoramic view from Hollywood Hills luxury home deck

1. Scale Drawings Prevent Costly Revisions

Every element must be precisely planned. Our 3D modeling process caught potential conflicts between the floating staircase and ceiling-mounted art lighting that would have cost $15,000 to resolve on-site.

2. Material Selection Drives Long-Term Satisfaction

Clients living with our projects for 5+ years consistently cite material choices as the key to continued satisfaction. Initial cost differences fade; daily experience with quality materials compounds over time.

3. Hidden Functionality Creates Memorable Moments

The most photographed and discussed elements in our projects are often the hidden surprises—secret doors, concealed storage, automated systems that respond to daily rhythms.

4. Integration Multiplies Impact

Individual elements work together exponentially. The floating staircase, hidden lighting, and material selection create combined experiences greater than their individual impacts.

5. Customization Justifies Investment

Mass-produced elements, regardless of quality, cannot create the specific solutions that make luxury homes truly exceptional. Custom millwork, bespoke furniture, and tailored systems deliver irreplaceable value.


Conclusion: Transforming Spaces Through Intentional Design

The difference between ordinary luxury and extraordinary custom design lies in the details—the engineering precision behind a monolithic marble fireplace, the craftsmanship that conceals wine storage within custom millwork, the material selection that improves with age rather than deteriorating.

Each element we’ve explored demonstrates how thoughtful design transforms functional requirements into memorable experiences. Whether it’s the drama of a 6-foot Nero Marquina slab making its silent statement, the surprise of discovering a temperature-controlled wine cellar behind seamless cabinetry, or the daily pleasure of brass fixtures developing unique patina patterns, intentional design choices create emotional connections between people and their spaces.

The investment in these three custom design elements extends beyond monetary returns. These projects create daily experiences that remind residents they’re living in something special spaces where architectural statements anchor rooms, hidden features delight guests, and materials become more beautiful with time rather than requiring replacement.

Ready to Elevate Your Space?

Book a consultation to discuss how we can bring these modern luxury design concepts to your project.

For more inspiration from our Hollywood Hills, Palisades, and Malibu projects, explore our portfolio and discover how custom modern luxury design creates extraordinary living experiences.

house lifting foundation repair

Real Life Up! The Art of Lift and Replace Foundation Repair

Real Life Up! The Art of Lift and Replace Foundation Repair 1200 800 Cecille Maristela

Introduction: When Your House Literally Needs a Lift

House lifting foundation repair, also known as “lift and replace,” isn’t just social media spectacle—it’s serious engineering that can literally elevate your home’s value and structural integrity.

This viral sensation has brought mainstream attention to house lifting—a proven foundation repair technique that’s been around for over a century. What started as a specialized service for extreme cases has become increasingly popular as homeowners discover it’s often the most effective solution for severe foundation problems, flood prevention, and structural rehabilitation in older homes.

What Is House Lifting? The Engineering Behind the Magic

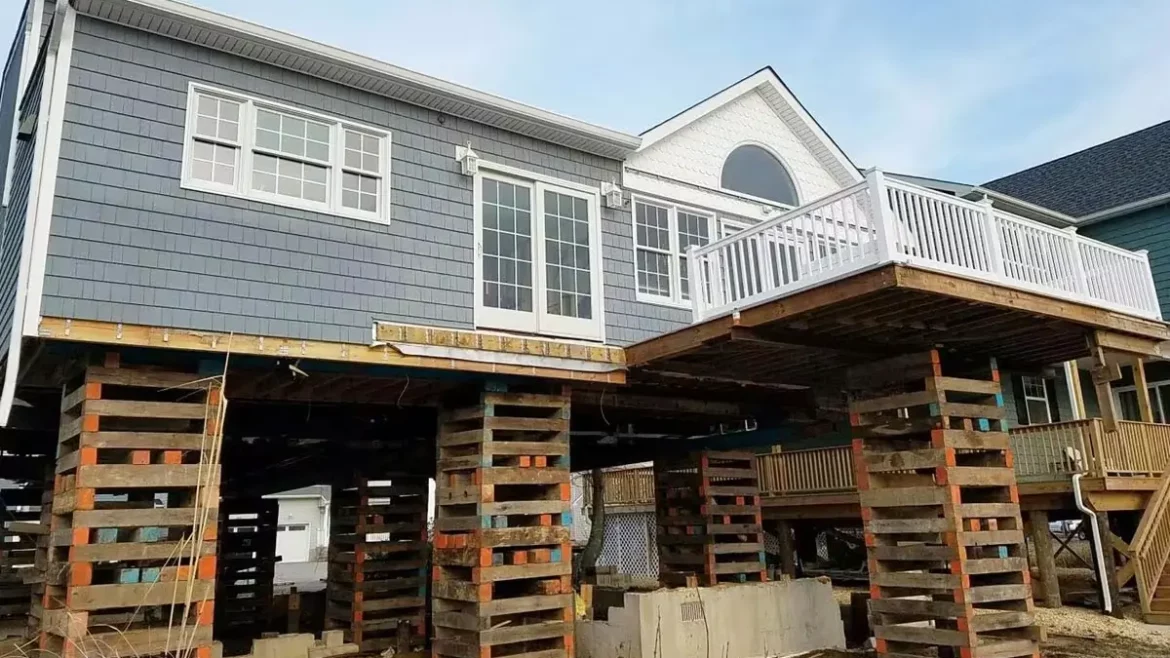
House lifting is exactly what it sounds like: using hydraulic jacks and steel beams to physically raise an entire structure off its foundation. The process allows contractors to repair, replace, or modify the foundation while the house remains intact and elevated above ground.

How House Lifting Works

The process involves strategically placed hydraulic jacks and steel support beams that distribute the house’s weight evenly during lifting. Modern lifting methods are far less invasive than traditional techniques because the home is never disconnected from its foundation or moved off its existing footprint.

Key Components:

  • Hydraulic jacking systems: Industrial-grade jacks capable of lifting 50+ tons
  • Steel support beams: Distribute weight across multiple load-bearing points
  • Cribbing systems: Temporary wooden or steel supports maintain elevation
  • Foundation work area: Space created beneath the lifted structure

Why Houses Need Lifting: Common Foundation Problems

house lifting foundation repair

Settlement and Sinking Issues

Older homes frequently experience differential settlement where parts of the foundation sink unevenly. This creates:

  • Cracked walls and ceilings
  • Doors and windows that won’t close properly
  • Sloping floors
  • Structural instability

Flood Prevention and Elevation Requirements

Homeowners like Neida Rodriguez in Houston have found that raising their home several inches eliminates flooding issues, with Rodriguez noting “The peace of mind is priceless” after no longer dreading rainy days.

FEMA Compliance:

  • New flood zone regulations
  • Insurance premium reductions
  • Disaster resilience improvements

Foundation Material Failures

Common issues requiring lift and replace:

  • Stone foundations: Crumbling mortar, settling stones
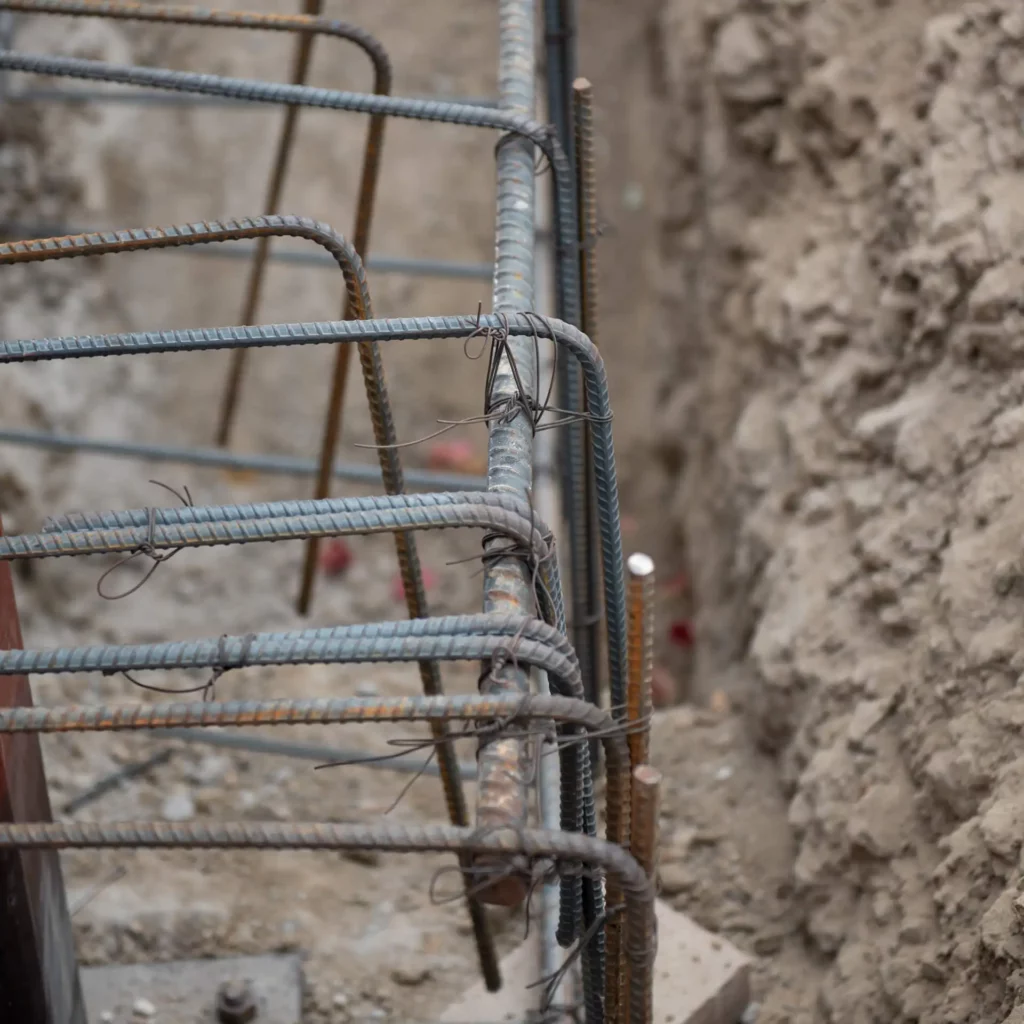
  • Old concrete: Cracking, spalling, inadequate reinforcement
  • Brick foundations: Moisture damage, structural deterioration
  • Wooden foundations: Rot, termite damage, code violations

Viral Videos and Social Media Impact: The SNS Phenomenon

The Video That Started It All

This viral Facebook video shows the entire house lifting process in stunning detail, with viewers amazed at how smoothly the massive structure rises into the air. Comments ranged from “This is like real-life Up!” to “I can’t believe this is even possible!” The video’s viral success demonstrates how fascinating people find this intersection of engineering and everyday problem-solving.

When House Lifting Makes Sense (And When It Doesn’t)

Ideal Candidates for House Lifting

Perfect Scenarios:

  • Historic homes worth preserving
  • Flood-prone properties needing elevation
  • Settlement issues affecting entire structure
  • Basement addition projects
  • Foundation material complete failure

House Characteristics:

  • Structurally sound frame and walls
  • Valuable enough to justify investment
  • Adequate lot space for equipment access
  • No major structural modifications needed

When Other Solutions Are Better

Alternative Approaches:

  • Underpinning: For localized settlement issues
  • Slab jacking: For concrete slab problems
  • Pier and beam repair: For minor structural issues
  • Demolition/rebuild: For extensively damaged structures

Deal-Breakers:

  • Severe structural damage to frame
  • Homes worth less than repair costs
  • Restrictive lot access
  • Local zoning restrictions

Conclusion: Lifting Your Home to New Heights

House lifting represents one of the most dramatic yet effective solutions for serious foundation problems. While viral videos make the process look almost magical, the goal should always be structural soundness rather than perfection, and success depends on proper planning, experienced contractors, and realistic expectations.

For homeowners facing severe foundation issues, flooding problems, or looking to add basement space, house lifting offers a proven path to literally elevating your property’s value and structural integrity.

What Is Roofing? Complete Guide to Roof Materials

What Is Roofing? Complete Guide to Roof Materials 1600 1200 Cecille Maristela

Your Roof Is Your Home’s First Line of Defense

Your roof does more than keep rain out—it’s a complex system that protects your entire investment, affects energy costs, and significantly impacts your property value. With roofing materials ranging from $3 to $15+ per square foot, choosing the right option requires understanding performance, longevity, and local climate factors.

Modern roofing systems can reduce energy costs by up to 40% while lasting 50+ years with proper maintenance. This guide breaks down everything you need to know about roofing materials, installation, and making the smart choice for your specific situation.

What Is a Roofing System?

A complete roofing system consists of multiple components working together:

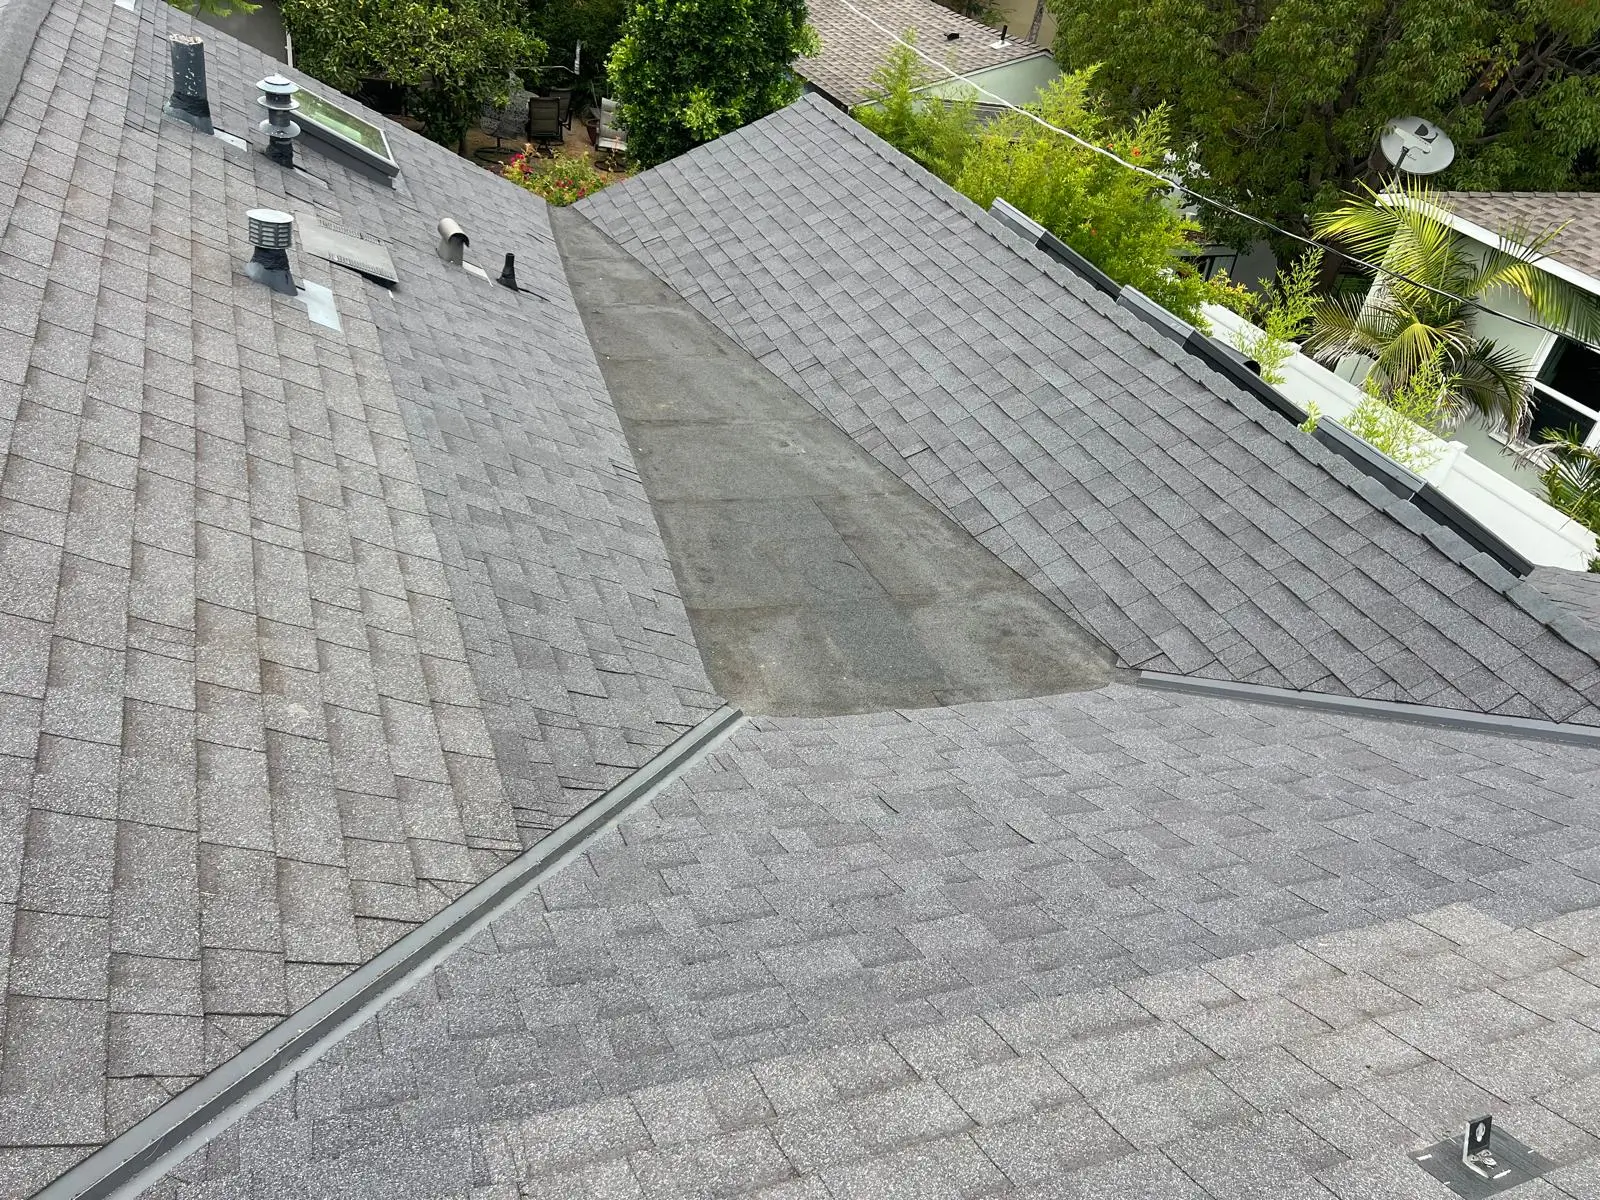
  • Roof deck/sheathing: The structural foundation (typically plywood or OSB)
  • Underlayment: Waterproof barrier beneath the visible roofing material
  • Roofing material: The outer layer (shingles, metal, tile, etc.)
  • Flashing: Metal strips that seal joints and prevent leaks
  • Ventilation: Ridge vents, soffit vents for air circulation
  • Gutters and drainage: Channels water away from the structure

Primary Functions of Roofing Systems

Weather Protection: Shields against rain, snow, hail, and UV radiation Insulation: Prevents heat loss in winter and heat gain in summer Structural Support: Distributes weight loads across the building frame Fire Resistance: Non-combustible materials meet building codes Aesthetic Appeal: Significantly influences home value and curb appeal


Types of Roofing Materials: Pros, Cons & Costs

roofing materials

Asphalt Shingles

Cost: $3-8 per square foot Lifespan: 15-30 years Best For: Budget-conscious homeowners, most climates

Pros:

  • Lowest upfront cost
  • Easy installation and repair
  • Wide variety of colors and styles
  • Good wind resistance (up to 130 mph for architectural shingles)

Cons:

  • Shorter lifespan than premium materials
  • Can crack in extreme temperature fluctuations
  • Not environmentally friendly (petroleum-based)

Roofing Materials

Metal Roofing

Cost: $8-16 per square foot Lifespan: 40-70 years Best For: Energy efficiency, severe weather areas, modern designs

Materials: Steel, aluminum, copper, zinc

Pros:

  • Excellent durability and weather resistance
  • Energy efficient (reflects heat, reduces cooling costs by 25%)
  • Fire resistant
  • Lightweight (reduces structural stress)
  • 100% recyclable

Cons:

  • Higher upfront cost
  • Can be noisy during heavy rain (with proper insulation, this is minimal)
  • Expansion/contraction requires proper installation

La Habra Luxury Home

Clay and Concrete Tiles

Cost: $10-18 per square foot Lifespan: 50-100+ years Best For: Mediterranean/Spanish styles, hot climates, areas with minimal freeze-thaw cycles

Pros:

  • Extremely long lifespan
  • Fire resistant
  • Energy efficient (thermal mass properties)
  • Low maintenance once installed
  • Pest resistant

Cons:

  • Very heavy (requires structural reinforcement)
  • Expensive installation
  • Brittle (can crack under impact)
  • Not suitable for steep slopes in freeze areas

Roofing Materials

Slate Roofing

Cost: $12-20 per square foot Lifespan: 75-150+ years Best For: Historic homes, premium applications, cold climates

Pros:

  • Longest lifespan of any roofing material
  • Natural stone beauty
  • Fire resistant
  • Environmentally sustainable
  • Increases property value significantly

Cons:

  • Highest material and installation costs
  • Extremely heavy (structural reinforcement required)
  • Difficult repairs (requires specialized contractors)
  • Can split in freeze-thaw cycles if low quality

Construction Schedule Delays

Wood Shingles and Shakes

Cost: $8-14 per square foot Lifespan: 25-40 years Best For: Cedar-friendly climates, rustic/traditional styles

Pros:

  • Natural insulation properties
  • Unique aesthetic appeal
  • Biodegradable and renewable
  • Good in moderate climates

Cons:

  • High maintenance requirements
  • Fire risk (banned in some areas)
  • Susceptible to rot, insects, and mold
  • Regular treatment needed (every 3-5 years)

How to Choose the Right Roofing Material

Roofing Materials

Climate Considerations

Hot, Sunny Climates:

  • Metal roofing (reflects heat)
  • Light-colored tiles
  • Avoid dark asphalt shingles

Cold, Snowy Areas:

  • Metal (snow slides off easily)
  • Slate (handles freeze-thaw well)
  • Steep roof slopes for snow shedding

High Wind Areas:

  • Impact-rated materials
  • Proper fastening critical
  • Avoid lightweight materials

Coastal Regions:

  • Corrosion-resistant metals (aluminum, copper)
  • Avoid steel without proper coatings
  • Salt spray considerations

Budget Planning

Total Cost Breakdown:

  • Materials: 40-50% of total project
  • Labor: 35-40%
  • Removal/disposal: 5-10%
  • Permits/inspections: 2-5%

Financing Options:

  • Cash payment (often 3-5% discount)
  • Home equity loans
  • Contractor financing
  • Insurance claims (storm damage)

Maintenance Tips for Long-Lasting Roofs

Luxury Home FInishes

Annual Inspection Checklist

  • Spring: Check for winter damage, clean gutters
  • Summer: Inspect flashing, ventilation systems
  • Fall: Clear debris, check for loose materials
  • Winter: Monitor ice dam formation, snow load

Warning Signs That Require Immediate Attention

  • Missing or damaged shingles
  • Water stains on interior ceilings
  • Granules in gutters (asphalt shingle deterioration)
  • Sagging roof lines
  • Daylight visible through roof boards

Latest Roofing Trends and Innovations

Smart Roofing Technology

  • Solar integration: Built-in solar panels and solar shingles
  • Cool roof technology: Heat-reflecting coatings reduce energy use
  • Smart sensors: Monitor moisture, temperature, structural integrity

Sustainable Materials

  • Recycled content: Rubber shingles from recycled tires
  • Green roofs: Living vegetation systems for urban environments
  • Reclaimed materials: Salvaged slate and wood for restoration projects

Design Trends

  • Mixed materials: Combining metal with traditional materials
  • Bold colors: Moving beyond standard browns and grays
  • Architectural details: Exposed fasteners, standing seam patterns

Conclusion: Invest in Quality Roofing for Long-Term Value

Your roofing choice impacts your home for decades. While premium materials cost more upfront, they often provide better value over time through energy savings, reduced maintenance, and increased property values.

The key factors in your decision should be:

  1. Climate compatibility
  2. Long-term cost analysis
  3. Structural requirements
  4. Local building codes
  5. Personal aesthetic preferences

Ready to Start Your Roofing Project?

Consult Substrata’s experts for roofing materials tailored to your climate, style, and budget.

Scandinavian-modern wood floors

Transforming an LA Home with Scandinavian-Modern Wood Floors

Transforming an LA Home with Scandinavian-Modern Wood Floors 1920 1080 Cecille Maristela

Introduction: The Scandinavian-Modern Wood Floors Appeal

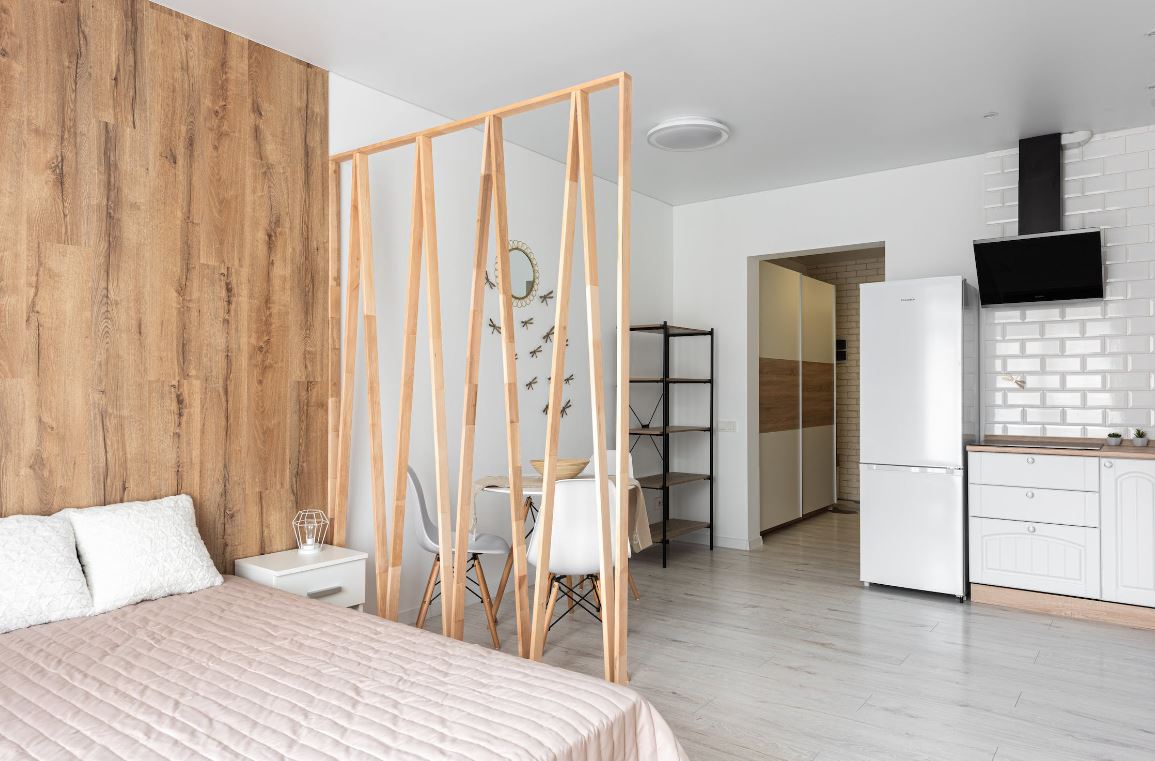
Scandinavian design merges minimalism, functionality, and natural elements—qualities perfectly embodied in wood flooring. For an LA home, light-toned wood floors enhance the bright, open feel typical of Scandinavian interiors while offering durability and increased home value.

Key Benefits:

  • Brightens spaces: Light woods like white oak reflect California’s abundant natural light.

  • Sustainable choices: Engineered wood and bamboo align with eco-conscious trends.

  • Timeless aesthetics: Matte finishes and wide planks avoid dated looks.


1. Choosing the Right Wood Flooring

Scandinavian-modern wood floors

A. Solid Hardwood

  • Best for: Living rooms, bedrooms (stable climates)

  • LA-friendly pick: White oak with a matte finish for a modern look.

  • Drawback: Avoid in basements or high-humidity areas.

B. Engineered Hardwood

  • Ideal for: Kitchens, basements (handles humidity better)

  • Trending in LA: Wire-brushed finishes for texture.

C. Luxury Vinyl Plank (LVP)

  • Budget-friendly: Waterproof options like Scandinavian Harbor Oak mimic wood authentically.

D. Bamboo & Exotics

  • Eco-star: Rapidly renewable bamboo suits California’s sustainability focus.


2. Pre-Installation Essentials

Scandinavian-modern wood floors

  • Subfloor prep: Ensure level, dry surfaces (critical for floating floors).

  • Acclimation: Let wood adjust to LA’s climate for 48+ hours to prevent warping.

  • Moisture barriers: Essential for concrete subfloors in coastal areas.


3. Installation Methods for LA Homes

Method Best For LA-Specific Tip
Nail-down Solid hardwood Use with plywood subfloors (common in older LA homes)
Glue-down Engineered wood/concrete Opt for low-VOC adhesives for indoor air quality
Floating LVP/engineered wood Ideal for quick remodels (no adhesive/nails)

4. Step-by-Step Installation

  1. Layout planning: Run planks parallel to windows for light-enhancing effects.

  2. Underlayment: Add cork for noise reduction (key for LA condos).

  3. Expansion gaps: Leave ½” gaps to accommodate seasonal humidity changes.


5. Common Mistakes to Avoid

  • Skipping acclimation: LA’s microclimates vary—wood needs time to adjust.
  • Ignoring transitions: Mismatched heights between rooms cause tripping hazards.

  • Poor lighting alignment: Planks perpendicular to windows highlight seams.


6. Maintenance for Longevity


  • Cleaning: Use pH-neutral cleaners; avoid steam mops.

  • Humidity control: Maintain 30–50% humidity to prevent gaps/cupping.

  • Refinishing: Solid hardwood can be sanded 3–5 times; engineered only 1–2.


7. Cost Breakdown

Material Cost/sq. ft. Best For
Solid white oak $8–$15 High-end remodels
Engineered oak $5–$12 Moisture-prone areas
LVP (waterproof) $3–$8 Budget-friendly projects

*Labor adds $3–$8/sq. ft. for professional installs*.


8. Trending in 2025

  • Wide planks (7”+) for open-concept spaces.

  • Herringbone patterns in entryways for drama.

  • Reclaimed wood for eco-chic appeal.


Conclusion: Your Scandinavian-Modern Oasis

Achieving this look in LA requires:
✔ Light, matte-finish woods (e.g., white oak)
✔ Proper installation to handle coastal humidity
✔ Minimalist decor (neutral tones, functional furniture)

Ready to Transform Your Home with a Scandinavian-modern Wood Floors?

📞 Contact our experts for a consultation tailored to LA’s climate and your design vision.

Cladding for Buildings

What Is Cladding for Buildings? A Complete Guide to Building Exteriors

What Is Cladding for Buildings? A Complete Guide to Building Exteriors 2560 1920 Cecille Maristela

Introduction: More Than Just a Pretty Façade

Cladding for buildings is the protective “skin” of the structure, serving both functional and aesthetic purposes. From weather resistance to energy efficiency, modern cladding systems do far more than just enhance curb appeal—they’re critical to a structure’s longevity and performance.


What Is Cladding?

Cladding refers to non-structural exterior layers installed over a building’s framework. Unlike load-bearing walls, cladding:
✔ Shields against rain, wind, and UV rays
✔ Improves thermal insulation (reducing energy costs by up to 30%)
✔ Provides design flexibility with diverse materials and textures

Common Applications:

  • Residential homes

  • Commercial high-rises

  • Industrial facilities


Key Benefits of Cladding

Benefit How It Helps Example
Weatherproofing Prevents water infiltration and structural damage Fiber cement resists hurricanes
Insulation Lowers HVAC costs; reduces noise (critical for urban builds) Metal panels with foam backing
Fire Safety Non-combustible options meet strict high-rise codes Brick veneer in wildfire zones
Low Maintenance Durable materials like vinyl need only occasional cleaning Vinyl siding in rainy climates
Aesthetic Value Transforms plain structures into architectural statements Copper cladding patinas beautifully

Types of Cladding Materials

Cladding for Buildings

A. Metal Cladding

  • Materials: Aluminum, steel, copper

  • Best For: Modern designs, coastal areas

  • Pros: Lightweight, recyclable, sleek look

  • Cons: Prone to dents; copper oxidizes (adds character but requires upkeep)

B. Wood Cladding

  • Materials: Cedar, redwood, engineered timber

  • Best For: Rustic or Scandinavian-style homes

  • Pros: Biodegradable, natural warmth

  • Cons: High maintenance (staining/sealing); fire risk

C. Vinyl (PVC) Cladding

  • Materials: Polyvinyl chloride

  • Best For: Budget-friendly residential projects

  • Pros: Waterproof, easy DIY installation

  • Cons: Can warp in extreme heat; limited design options


How to Choose the Right Cladding

Consider these factors:

  1. Climate:
    • Coastal? Use corrosion-resistant metals or fiber cement.
    • Fire-prone? Brick or stone veneers are safest.
  2. Budget:
    • Low-cost: Vinyl ($3–$8/sq. ft.)
    • Premium: Natural stone ($15–$30/sq. ft.)
  3. Maintenance:
    • High-effort: Wood (annual sealing)
    • Low-effort: Fiber cement (occasional rinsing)
  4. Sustainability:
    • Recycled metal or composite cladding (60% less waste than traditional materials)

Installation & Maintenance Tips

Cladding for Buildings

  • Always hire professionals for heavy materials (e.g., stone, fiber cement).

  • Seal joints with waterproof membranes to prevent leaks.

  • Clean annually:

    • Vinyl: Mild soap + water

    • Metal: Non-abrasive cleaners

    • Wood: Gentle pressure washing


Latest Trends in Cladding for Buildings

  • Dynamic Facades: Moving panels that adjust to sunlight (e.g., kinetic aluminum systems)

  • Mixed Materials: Combining wood + metal for contrast

  • Self-Cleaning Coatings: TiO2-treated surfaces that break down dirt


Conclusion: Cladding That Stands the Test of Time

Whether you prioritize durability, energy efficiency, or showstopping design, the right cladding elevates your building’s performance and value.

🚀 Ready to Transform Your Exterior?

📞 Consult Substrata’s experts for cladding tailored to your climate, style, and budget.

Sustainable Building Materials

Construction Schedule Delays: What Really Impacts It (And What Doesn’t)

Construction Schedule Delays: What Really Impacts It (And What Doesn’t) 1024 768 Cecille Maristela

1. Permitting: The Unavoidable Wildcard

City approvals are consistently ranked as a top cause of construction schedule delays, with timelines varying wildly by municipality. In Los Angeles, permit processing can take 4–12 weeks—or longer if revisions are required.

Why it’s unpredictable:

  • Plan checks: 60% of projects require resubmission for code compliance.

  • Case study: A Brentwood remodel was stalled 8 weeks over a missed fire sprinkler note in the plans.

Pro Tip:

“Start permit applications during design—don’t wait for ‘perfect’ plans.”


2. Design Changes Mid-Project: The Ripple Effect

Scope shifts after groundbreaking are a leading cause of project timeline management failures:

Construction Schedule Delays

  • Minor tweak (e.g., tile selection): 1–2 week delay

  • Major change (e.g., moving plumbing): 4+ weeks

  • Real-world impact: A Hollywood Hills client added a steam shower late, pushing completion by 6 weeks for vapor barrier retrofits.

Key Insight:
Freeze designs before breaking ground to avoid 35–40% of delay risks tied to rework.


3. Weather’s Impact (Beyond Just Rain)

Construction Schedule Delays

Outdoor phases are 30% longer in coastal CA vs. desert regions due to:
☀ Extreme heat: Cures concrete too fast, causing cracks
🌬 Santa Ana winds: Halt crane operations
🌧 High humidity: Delays paint/drywall drying

Mitigation:

  • Schedule roofing in dry months

  • Use weather-resistant materials like synthetic stucco


4. Material Lead Times: The Hidden Schedule Killer

2024’s longest waits:

  • Custom windows: 14–18 weeks

  • Italian tile: 12+ weeks

  • HVAC equipment: 8–10 weeks

Workaround:
✔ Order materials before permits are approved
✔ Specify alternates in contracts


What DOESN’T Cause Construction Schedule Delays

East Blvd. Substrata

✅Crew Availability

*(Our vetted trades are scheduled 6+ months out)*

✅Equipment Rentals

(Long-term supplier relationships ensure availability)

✅ Substrata’s Processes

(AI-powered project management software auto-flags bottlenecks)


5. How Substrata Stays On Track

Future-proof construction

1. The 80/20 Planning Rule

  • 80% of materials ordered before groundbreaking

  • 20% buffer time for unavoidable delays

2. Tech-Enabled Transparency

  • Live progress dashboards for clients

  • AI-powered delay predictions

3. Contingency Protocols

  • Pre-approved alternate materials

  • On-site weather mitigation kits


Key Takeaway: Control What You Can

While you can’t fix permitting or weather, you can:
✔ Freeze designs early
✔ Prioritize long-lead items
✔ Choose contractors with contingency experience

🚀 Need a Team That Delays Less?

📞 Substrata’s average project finishes within 5% of original timeline— Contact us for your Los Angeles build.

Construction Fails: A Cautionary Guide to Avoiding Costly Mistakes

Construction Fails: A Cautionary Guide to Avoiding Costly Mistakes 2560 1920 Cecille Maristela

Introduction: Why Construction Fails Matter

A single construction mistake can cost thousands to fix—or even compromise your safety. While some construction fails go viral for being outrageous (like the infamous “upside-down house”), most are preventable with proper planning.

“90% of construction defects stem from poor workmanship or ignored codes.” — National Association of Home Builders


Top 5 Construction Fails (And How to Avoid Them)

Foundation Nightmares

Fail: Uneven settling, cracked slabs
Fix: Always conduct geotechnical surveys before pouring concrete.

Electrical Disasters

Construction Fails

Photo by Thayne Tuason, licensed under CC by 4.0

Fail: Exposed wires, overloaded panels
Fix: Hire licensed electricians—never cut corners.

Plumbing Catastrophes

Construction Fails

Fail: Leaks, sewer backups
Fix: Pressure-test all lines and use PEX for freeze resistance.

Structural Blunders

Fail: Collapsed load-bearing walls
Fix: Consult a structural engineer before demolition.

Roofing Regrets

Construction Fail

Fail: Leaks, missing flashing
Fix: Use ice-and-water shield and metal drip edges.


Why Do These Fails Happen?

The top culprits:

  • “Savvy” DIYers (YouTube ≠ a contractor’s license)

  • Unlicensed contractors (40% of complaints cite unpermitted work)

  • Rushed timelines (Quality can’t be fast and cheap)


How to Avoid Becoming a Horror Story

✔ Vet contractors: Check licenses, insurance, and reviews
✔ Pull permits: Required for structural/electrical/plumbing work
✔ Invest in materials: Cheap tiles crack; cheap paint peels
✔ Inspect progress: Don’t wait until the final walkthrough

Pro Tip:

“If a bid seems too good to be true, it is. Skilled labor costs what it costs.”


Conclusion: Build Smart, Not Sorry

While construction fails make for entertaining memes, they’re no joke for homeowners. The solution? Hire experts, follow codes, and never prioritize speed over safety.

🚀 Need a Trusted Contractor?

📞 Contact Substrata—we fix others’ mistakes and build right the first time.

Argyle Ave. Project: Luxury Kitchen Renovation

Kitchen Design Essentials: Work Triangle vs. Modern Zones

Kitchen Design Essentials: Work Triangle vs. Modern Zones 2500 1667 Cecille Maristela

What Is the Kitchen Work Triangle?

The kitchen work triangle—connecting the sink, stove, and refrigerator—has been a gold standard since the 1940s. Here’s why it works:

✅ Efficient Movement – Minimizes steps between key tasks
✅ Ideal Measurements – Each side should be 4–9 feet (total perimeter: 13–26 feet)
✅ Single-Cook Friendly – Perfect for smaller, traditional kitchens

“The triangle reduces wasted steps, but modern kitchens often need more flexibility.”
— Substrata Design Team


When Does the Work Triangle Fall Short?

Today’s kitchens face new challenges:

❌ Multiple Cooks – Families need wider workflows
❌ Open-Concept Layouts – Islands and peninsulas disrupt the triangle
❌ Extra Appliances – Double ovens, coffee stations, and prep sinks demand more zones

Example: A recent Los Angeles kitchen remodel by Substrata added a second sink for bar prep, requiring a zone-based approach.

kitchen work triangle explained


The Modern Solution: Kitchen Work Zones

Instead of just 3 points, 5 functional zones optimize today’s kitchens:

  1. Prep Zone (Cutting boards, knives)

  2. Cooking Zone (Range, oven)

  3. Cleaning Zone (Sink, dishwasher)

  4. Storage Zone (Fridge, pantry)

  5. Serving Zone (Plates, glassware)

Benefits:
✔ Better traffic flow for families
✔ Adapts to L-shaped, galley, or open layouts
✔ Keeps tools where they’re used most


Key Considerations for Your Kitchen Layout

Hollywood Hills Luxury Home Chef's Kitchen

Whether you choose a triangle or zones, prioritize:

🔹 Clear Pathways – Avoid foot traffic bottlenecks
🔹 Smart Storage – Pull-out shelves, deep drawers
🔹 Durable Materials – Quartz countertops, hardwood floors
🔹 Layered Lighting – Under-cabinet LEDs + statement pendants


Which Layout Is Best for Your Home?

Choose the work triangle if:

  • You have a compact kitchen

  • You typically cook alone

Opt for work zones if:

  • You entertain often

  • Multiple people use the kitchen

  • You have an open-concept space


Ready to Remodel Your Los Angeles Kitchen?

At Substrata Construction, we design kitchens that balance function and beauty. From classic triangles to modern zones, we tailor layouts to your lifestyle.

📞 Schedule a free consultation today!